There is an increasing demand for functional offices in homes and in corporate settings. But functionality is not the only factor on my clients’ wish lists. They also want office furniture that is stylish, has professional polish, and that looks unique, fresh, and sometimes… fun! Unfortunately, good-looking, and functional home-office components are not available on every street corner or even easily accessible online. After searches for products that met their storage requirements and fit in with their personal style came up short, clients contacted me for help.
With time, I developed partnerships with manufacturers that sell to the ‘trade’ (not to public consumers). These manufacturers have a vast choice of stylish and durable office furniture collections that you will never see in stores and on websites. The average stores and their websites reflect standard office set-ups that all look the same. They are either dark and masculine, or white and cheap with little or no design style integrated in the components, finishes or colours.
If you have been searching for office furniture that is unique, exceptionally durable, and beautiful enough to integrate anywhere, here is a sampling of what is available from my partners and vendors.
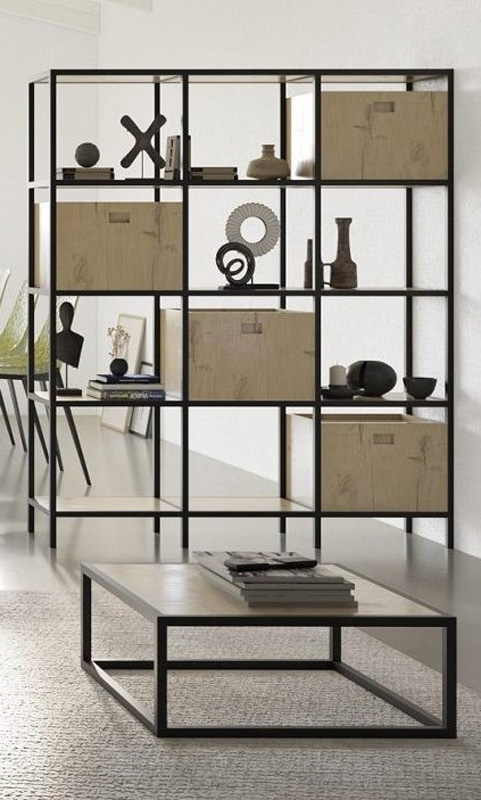
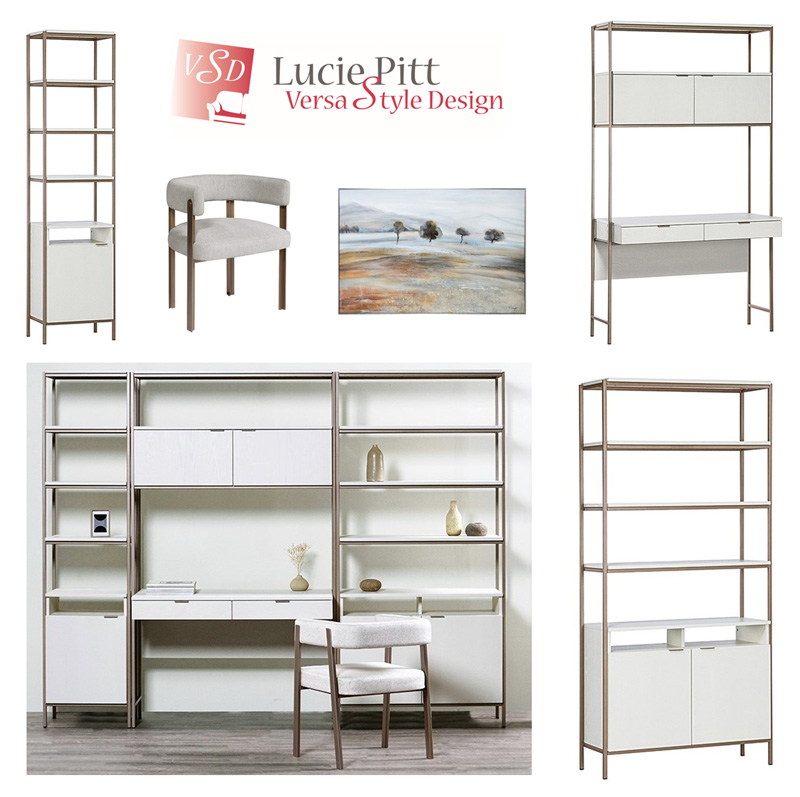
This is a wonderful modular system, with as many possibilities and configurations as you need. It is so good-looking that it would fit nicely integrated in your living room or any common area. The structure is constructed out of oak wood in a cream-coloured finish. The legs and posts are made of steel and coated with a Champagne Gold. The handles are made of Aluminum and the drawers are all soft-close. There is a secure anti-tipping kit included. The chair, made of wood and weaved fabric is extremely comfortable, and the artwork, from a Montreal artist, creates a focal point and adds a hit of colour.
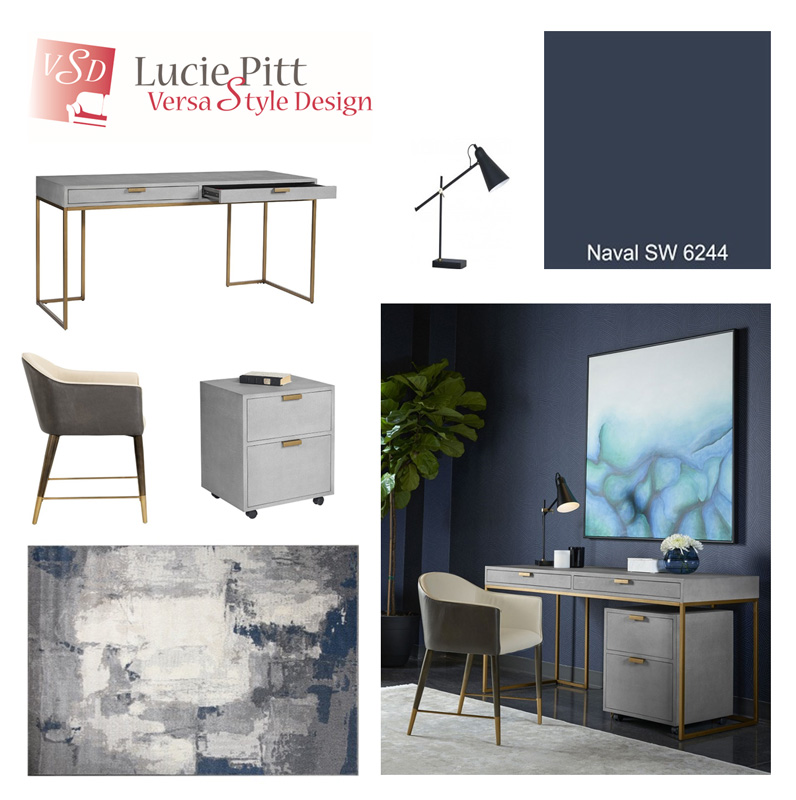
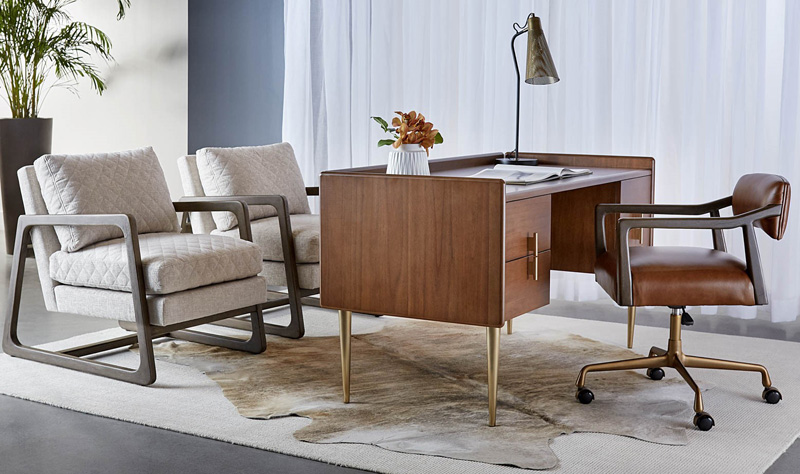
Enjoy high productivity with this eye-catching desk and filing cabinet. They are covered in bonded leather with a textured shagreen finish and the iron structure and handles are finished in antique brass. Two drawers in the desk offer ample storage. The chair, made of wood, brass and durable fabrics is stylish and comfortable. The table lamp is adjustable and the area rug, in blue, white and grey anchors the office set up and adds colour and visual interest. In addition to blue, this collection would look fabulous with any colour palette, including pastels.
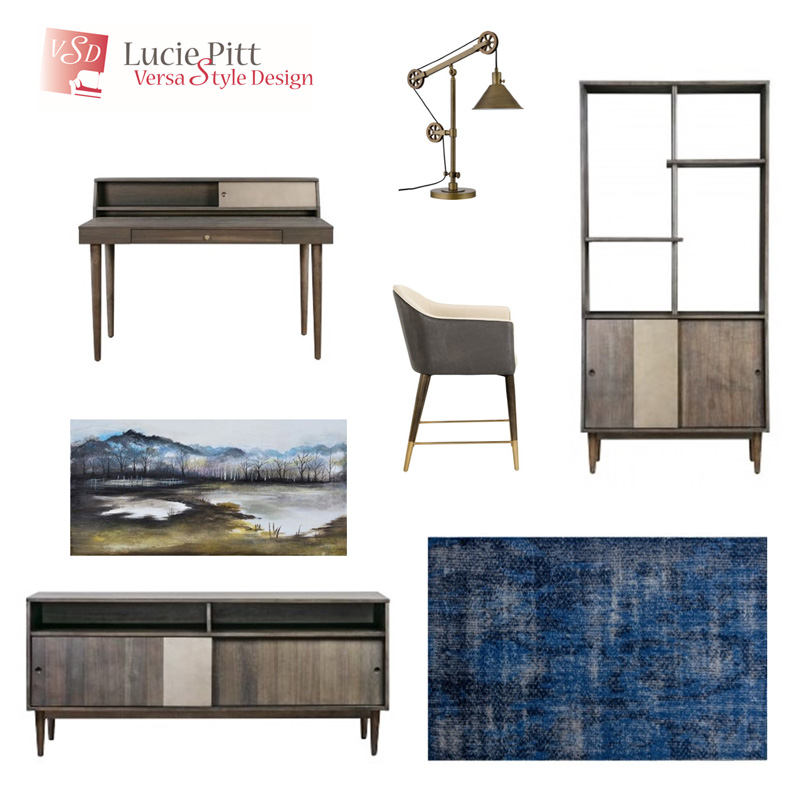
If your favourite style is rustic-industrial, then this look is great. The components are all durable with plenty of professional polish but with added pizzazz. The large blue area rug picks up on the tones in the artwork by a Montreal artist. The adjustable industrial-style desk lamp compliments the look and ensures plenty of light for the work surface. Furniture collections and accessories like these are not for sale in your average office supply store. They are not safe or standard enough…. which is precisely why you need a designer with a network of ‘to-the-trade’ suppliers.

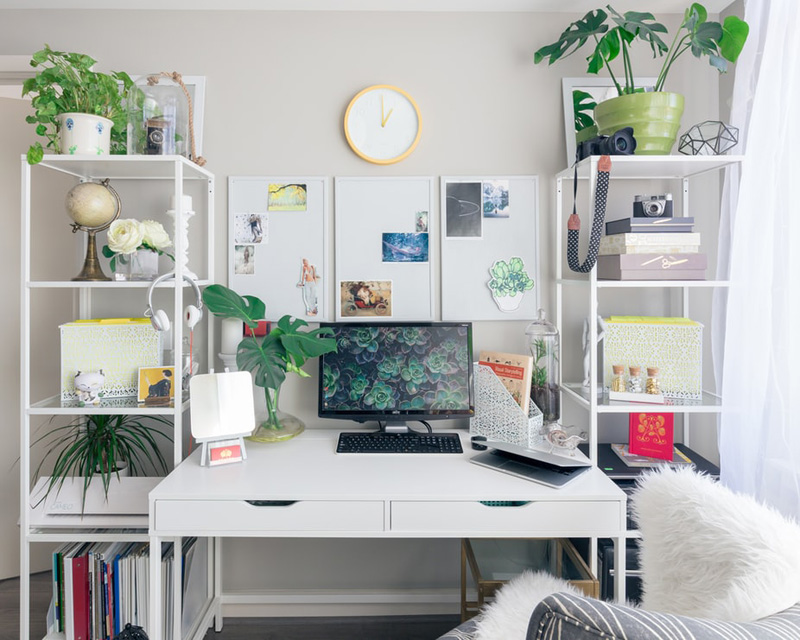
With this white high-gloss collection of furniture, my client wanted an office that included pastel colours and a space with a light and airy vibe. However, this white lacquer and stainless-steel collection would be just at home with more prominent colours or simply neutral shades such as beige, taupe or grey. The marble lamp, original artwork and quilted white leather swivel chair are perfect for this palette and style. Chic, functional, uncluttered and very professional.

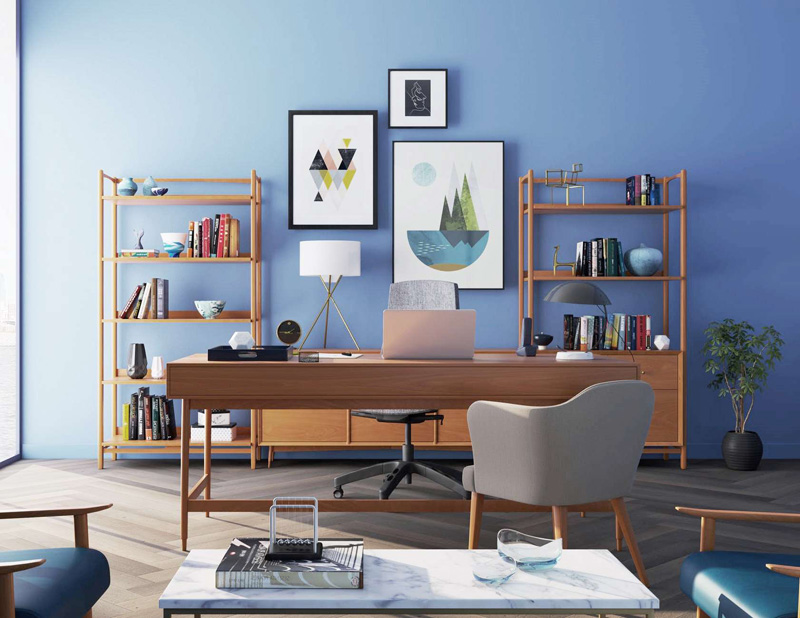
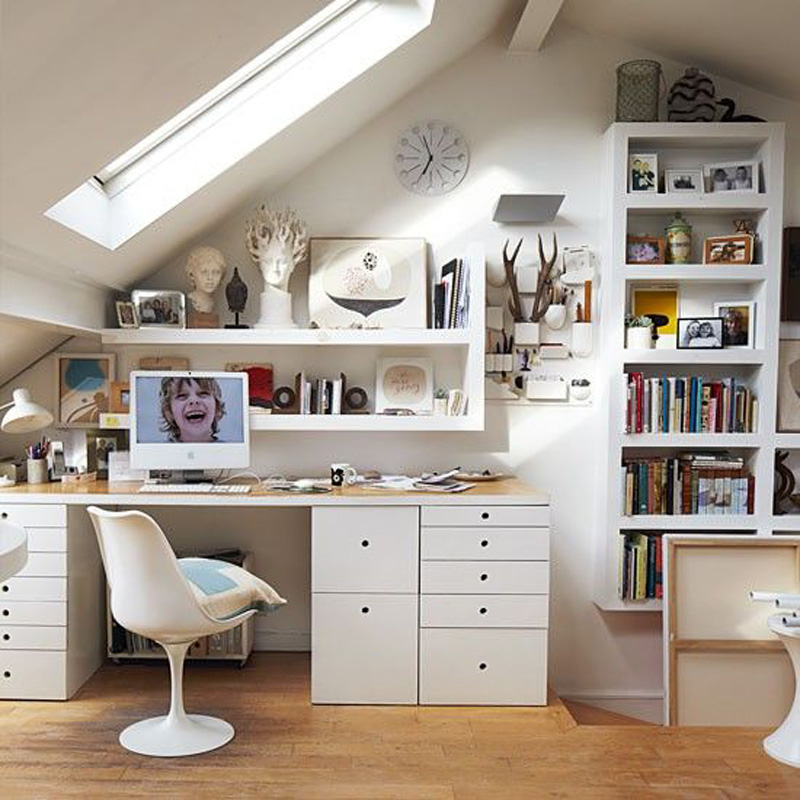
If you love rich wood tones with accents of warm metals, then you will love this office set up. There is a great combination of closed storage for hiding away clutter, but also enough open shelving for quick and easy access to those items that you frequently use during your work week. Crafted from raw umber oak veneer with three soft closing drawers for ample storage. Brushed gold iron hardware completes the look. Also available in a taupe oak veneer with a black iron frame. The artwork is from a Montreal artist and the area rug adds a touch of elegance and comfort.
You would like to adopt some of these ideas in your own space but you don’t know where to start?
Contact us to transform your home or office according to your style, your budget and your specific needs. By discussing your project we can provide you with relevant information concerning our services, the process and our design fee.
Click here to contact us.