Versa Style Design

Montreal Interior Design and Renovation Services

  • Home Renovations
    • Kitchens
    • Bathrooms and Laundry
    • Basements
    • Luxury Interior Design
  • Get Organized
    • Small Spaces
    • Kids’ Bedroom and Playroom
    • Closets and Walk Ins
    • Office Design
    • Home Theater
  • Design
    • Living Rooms and Dining Rooms
    • Bedrooms
    • Exterior Design
    • Perfect Colours
    • Custom Furniture Design
    • Curtains and Blinds Design
    • Walls that make a Statement
    • Man Caves and Garages
    • Online Design Services
  • Reviews
  • Portfolio
    • Kitchens
    • Bathrooms
    • Living Rooms and Dining Rooms
    • Bedrooms
    • Basement
    • Exteriors
    • Offices
    • Vestibules, Halls, and Stairs
    • Home Gym
    • Wine Cellar
    • Kids’ Bedroom and Playroom
    • Custom Furniture
  • About
  • Contact
  • Français

Jul 29 2019

6 Professional Tricks of the Trade for Bathrooms on a Budget!

Does your bathroom need updating? Are you wondering if you should renovate or just redecorate? Create a sensational bathroom while respecting your budget! Here’s how…

 1. Avoid re-configuring

1. Avoid re-configuring

Re-plumbing increases costs in material but even more in labor, so keep toilets, sinks and showers as close to their original location as possible. If you must move something, sinks are generally the cheapest to reposition.

2. Exchange or tweak your vanity

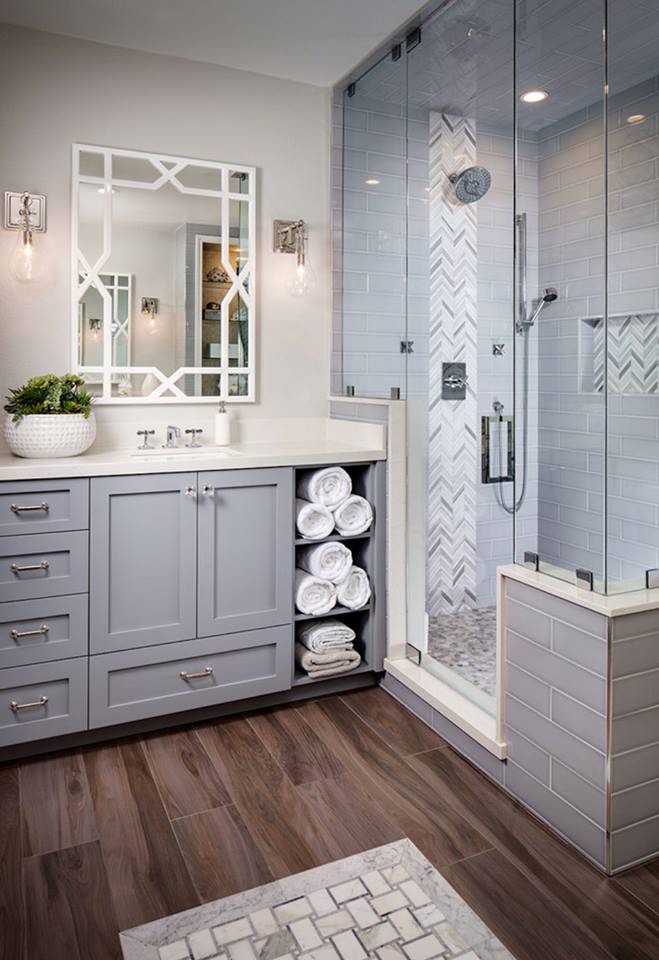
Since your vanity is so important in the bathroom, replacing the old one with new stock item off the shelves is a great budget-conscious strategy. Take time to carefully evaluate your storage space needs.

One thing is for sure; having an efficient and organized space is essential and will go far in giving the bathroom a facelift.

Budget bathroom - Exchange or tweak your vanity
Or up-cycle current vanity

Or up-cycle current vanity

New paint products make it easy to change the colour and the finish of your out-of-style older vanity. To get a professional and durable finish, it’s worth investing in an experienced painter. Then all you have to do is change up the door handles and drawer pulls for an updated new style.

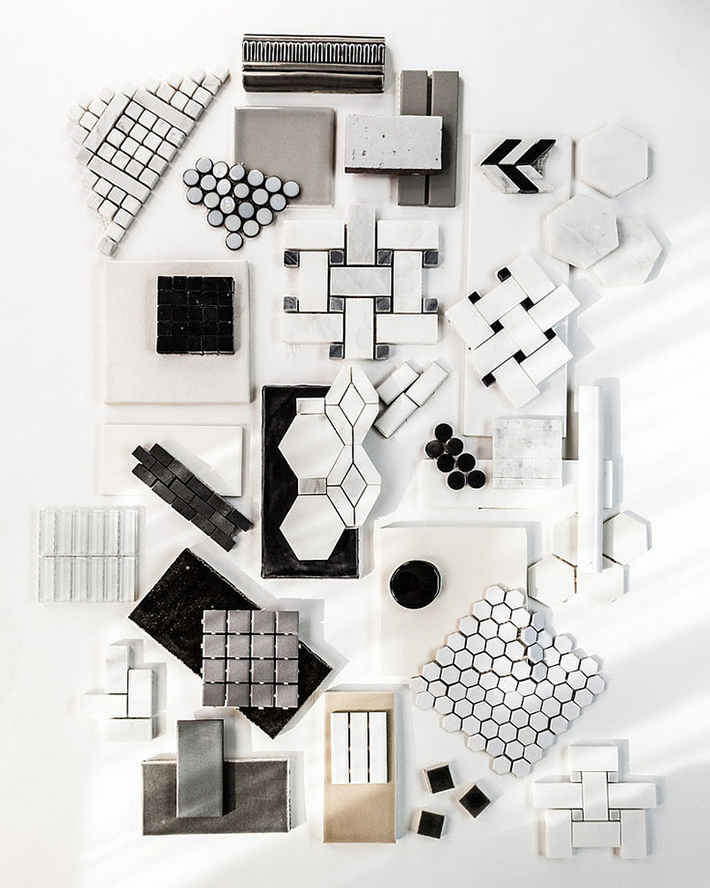
3. Make budget tiles look great by using contrasting colours

Inexpensive tile looks rich in two-tone contrasting or complementary shades. You can also play with the sizes, or be bold with a tiled stripe that travels around the room as a border and visual focal point.

Make budget tiles look great by using contrasting colours
Create ambiance by using colour

4. Create ambiance by using colour

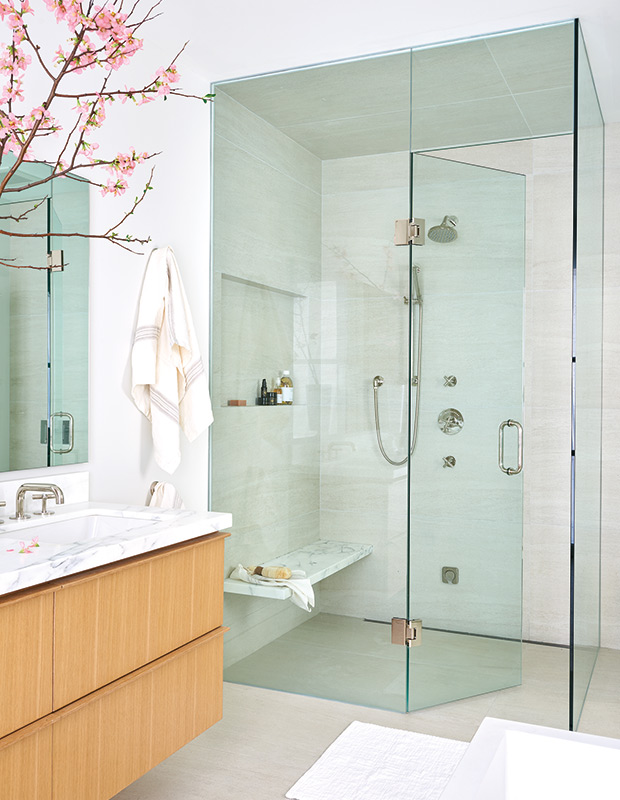
Renovations allow for a more functional space, but we also need ambiance and a bathroom that reflects who we are. Do you prefer a serene bathroom or a dynamic one? The colour will make the difference.

5. look for deals on faucets and other accessories

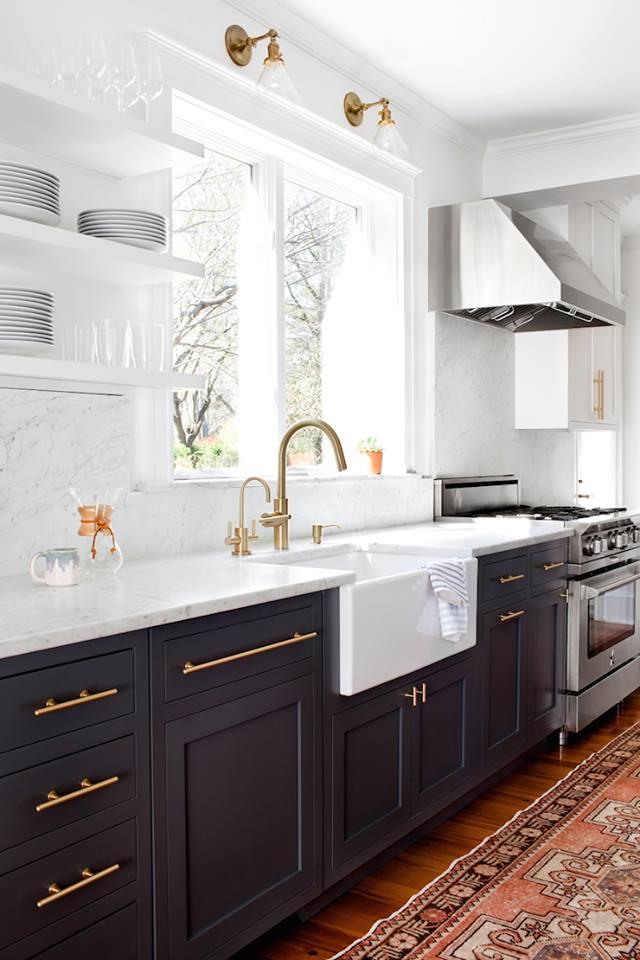
You may love the look of brushed nickel, but chrome offers a similarly modern accent at a much lower cost. You are not obligated to buy every piece from the same brand provided you choose faucets in the same finish. This way you can choose and combine elements from a number of different manufacturers when they put certain collections on special.

look for deals on faucets and other accessories

6. Take advantage of the fact that accessories cost less

Bathroom on a budget - Take advantage of the fact that accessories cost less

Stacking white towels is an economical way to get that boutique-hotel look, while pillar candles, a few fragrant soaps and fresh-cut flowers lend spa tranquility without the spa price tag. Updating and upgrading low-cost items like towel bars or mirrors and the hardware on drawers and doors can breathe new life into an old bathroom, for a fraction of the cost of a full renovation.

Finally

Planning ahead is the key to a successful bathroom renovation, especially when you’re on a strict budget! You will avoid second guesses and costly errors. It pays to spend time planning, measuring and consulting before you start your bathroom project.

Bathroom on a budget

You would like to adopt some of these ideas in your own space but you don’t know where to start?

Contact us to transform your home or office according to your style, your budget and your specific needs. By discussing your project we can provide you with relevant information concerning our services, the process and our design fee.

Click here to contact us.

Bathroom Design

Written by Lucie Pitt · Categorized: Bathroom · Tagged: bathroom, bathroom design, bathroom re-modeling, bathroom renovations

Jul 10 2019

Decorating with Black

Decorating with Black

When it is used strategically and harmonized, this subtle and nuanced shade is perfectly elegant, dramatic, luminous, graphic and chic.
In fact, painting a wall black is considered quite trendy. Black easily adapts to any room in the house as well as the outdoors and can even be used in a child’s room. Frequently combined with white it is very present in the ever popular Scandinavian decor themes. When it is applied to certain architectural elements such as stairs, fireplace walls, beams and woodwork it adds value and elegance.

Clarke & Clarke fabrics available
with Versa style Design

When it comes to black everything is possible, whether you dare to use a lot of it or you choose to add it as an accent. In the bathroom, for instance, you can choose black plumbing fixtures, black floor tiles, a black free standing bath, a black vanity or limit yourself to a black and white backsplash tile. Today it is standard practice to paint old floor boards, shutters, main entrance doors as well as certain kitchen elements in black.

Decorating with Black

Black doesn’t stop there! We find it in furniture, lighting, table linens, upholstery, curtains, area rugs and even artwork like this painting of a red dress in a black room available with Versa Style Design.

So why is it that we love black in interior design so much? Because it is a shade that literally looks great with every other colour!
Here are some decorating ideas to inspire you to integrate more black into your home.

Paint the ceiling black for a refreshing and unique look

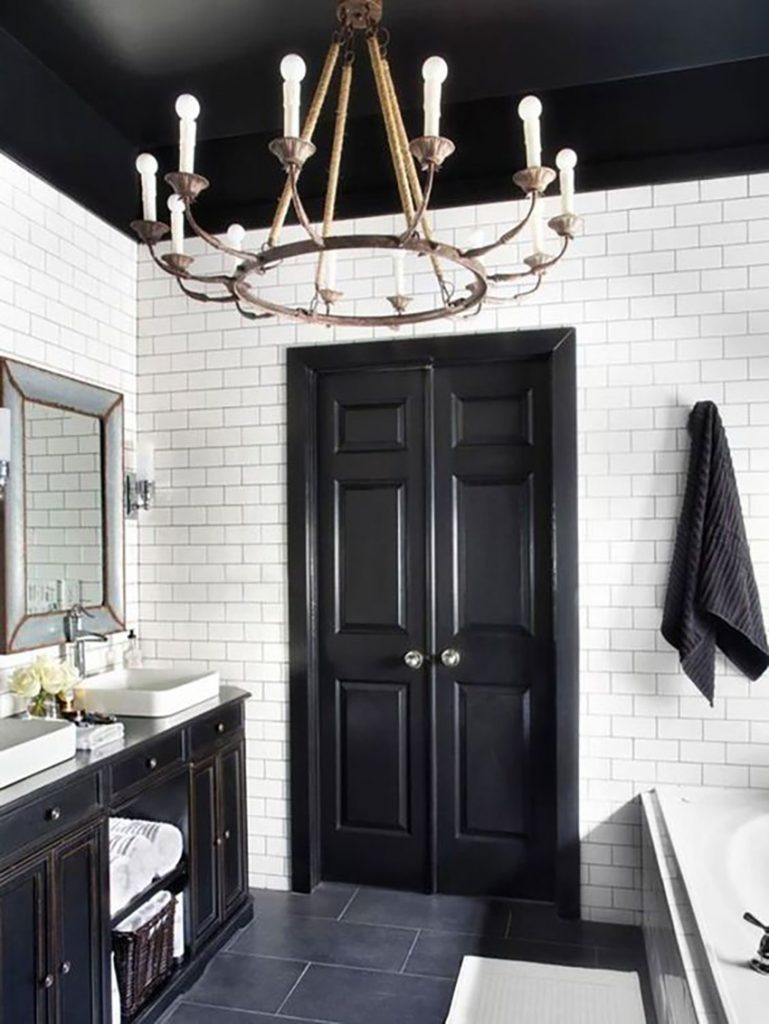
There is a reason why most ceilings are white or cream. In effect, white seems to make a room seem larger, it reflects natural light and it makes ceilings look taller. This is a well established design trick. If white is the designer’s friend, this does not by any means make black an enemy.

Painting a ceiling black is avant-garde as well as chic, providing there is sufficient ceiling height. A satiny and slightly reflective paint finish will also help in preventing a claustrophobic feeling while reflecting back the white of the surrounding walls, such as with this vintage looking black and white bathroom. Notice how good the black door looks as well.
Paint the ceiling black for a refreshing and unique look

Apply black on textured and high-relief surfaces
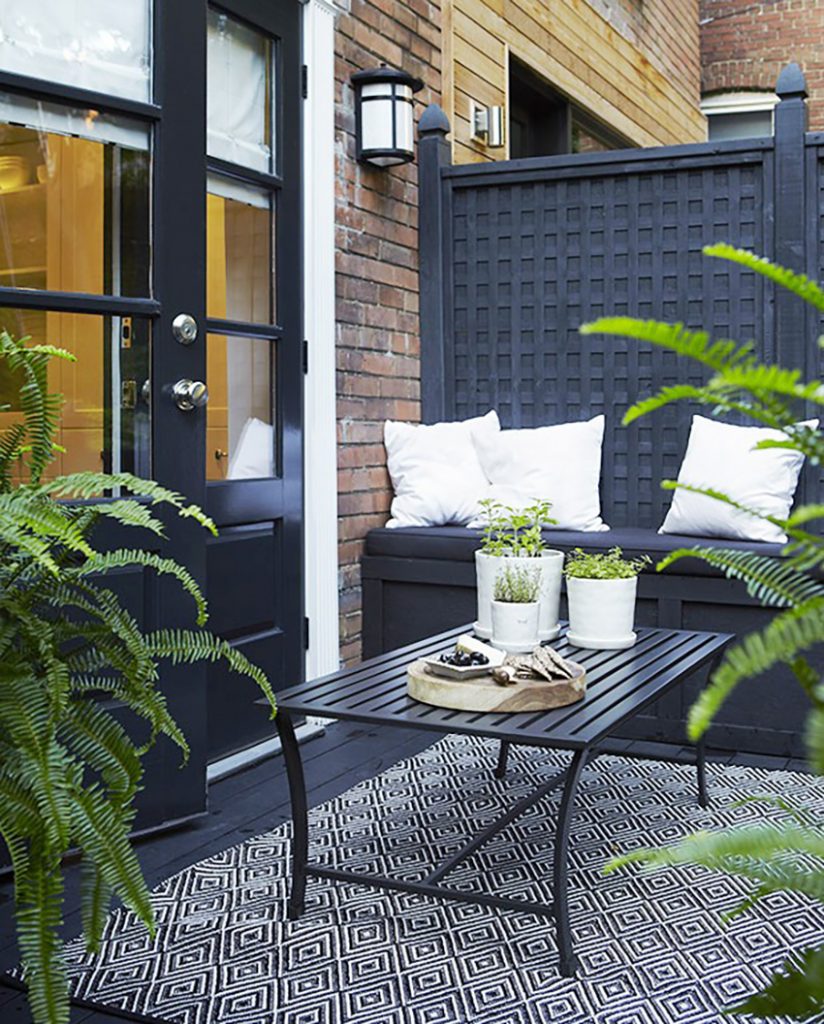
Apply black on textured and high-relief surfaces

You want black that really makes a statement? Combine black with relief and geometric surfaces, and create a graphic effect by surrounding it with crisp white. Even compact spaces, such as this small yard will have style and character.

Notice, once again, the black doors have been painted in a glossy finish, whereas the wall and floor have been painted matte. The green of the plants looks almost fluorescent against a black backdrop. Black and green are a wonderful combination for the interior as well.

Revisit Scandinavian style with some black in your kitchen

Black kitchens are very trendy. Both matte and glossy finishes are popular. Black is very effective in small spaces because it creates an intimate mood. This kitchen has a lot of personality with its mix of black with blond wood, graphic checker floor tiles and white cabinetry.

This is a fast and simple way of adding a touch of Scandinavian style to any room; neutral tones, natural wood and geometric lines. It is best to limit the amount of furniture and accessories so the space is clean and organized. If there is an overload of information for the eyes to take in, the space will seem small and cramped. Keep it simple.
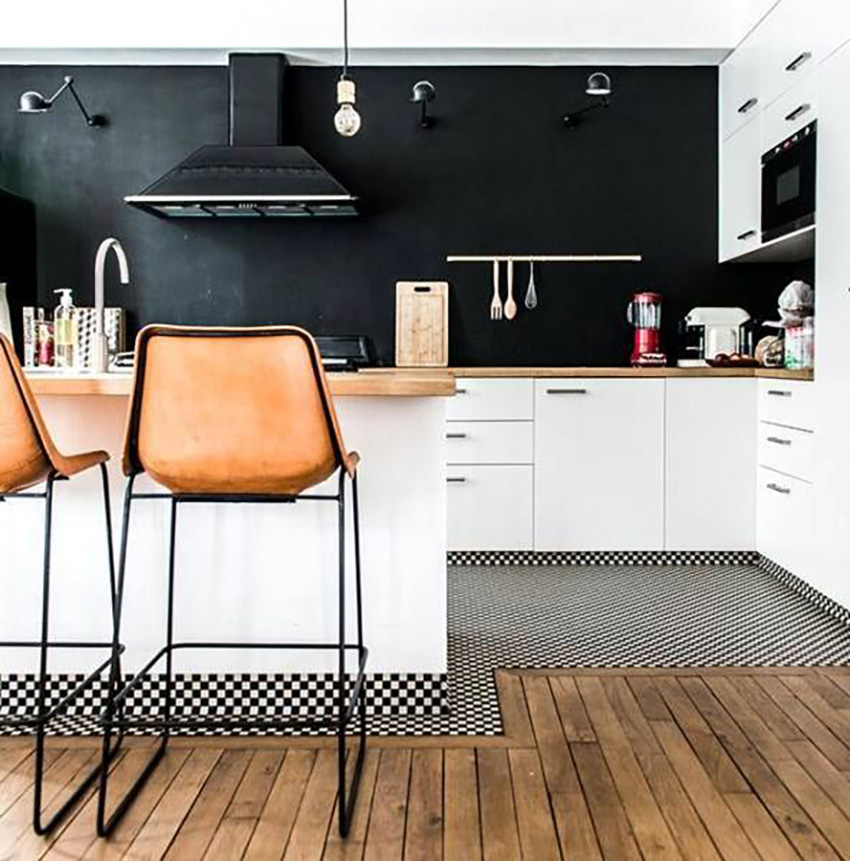
Revisit Scandinavian style with some black in your kitchen

Black and white bathrooms are a trend
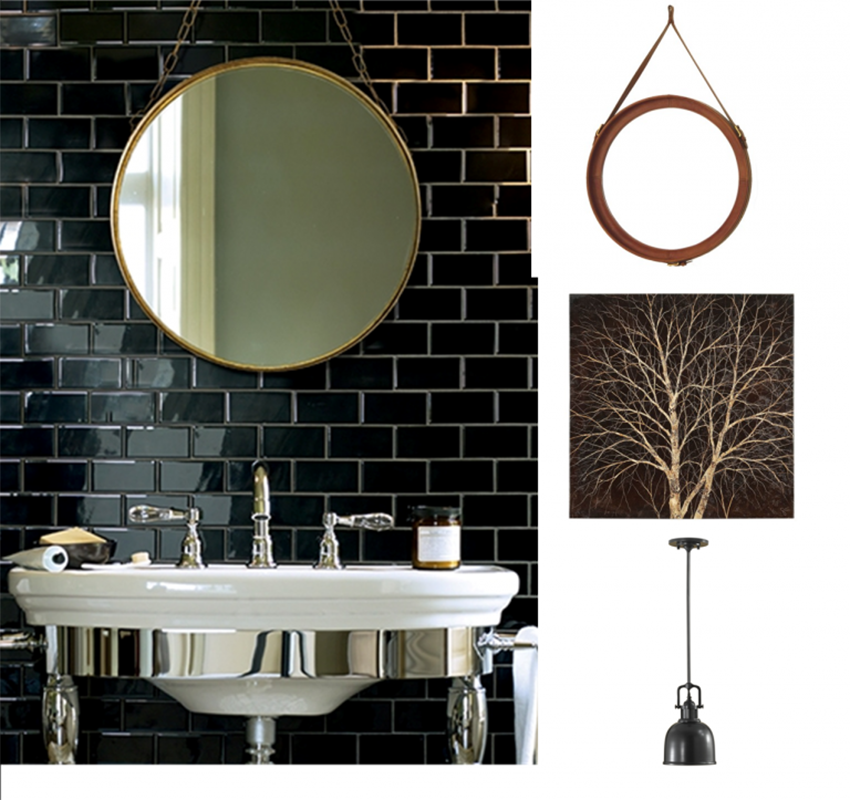
Black and white bathrooms are a trend

The combination of black and white in interior design is a winning duo. The total absence of colour creates a modern and refined feel, even if the style is country or vintage. Combining urban retro subway tiles with sophisticated fixtures and accessories adds an edge to the design. Notice how all the surfaces are lacquered and brilliant in order to reflect the existing natural light in this tiny bathroom. The remaining walls should remain neutral and simple. Mirror, artwork and lighting available with Versa Style Design.

Black can be used in small spaces like bathrooms provided there is a strategic balance with lighting. This is why choosing reflective surfaces and finishes are so important. For a stylish and bold look, go ahead and choose a black free-standing bath and vanity, making sure to balance out the dark with a sufficient amount of a pale neutral tone such as white.
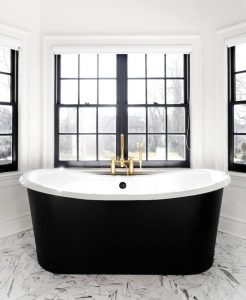
Black and white bathrooms are a trend

Inject some contrast into the design scheme
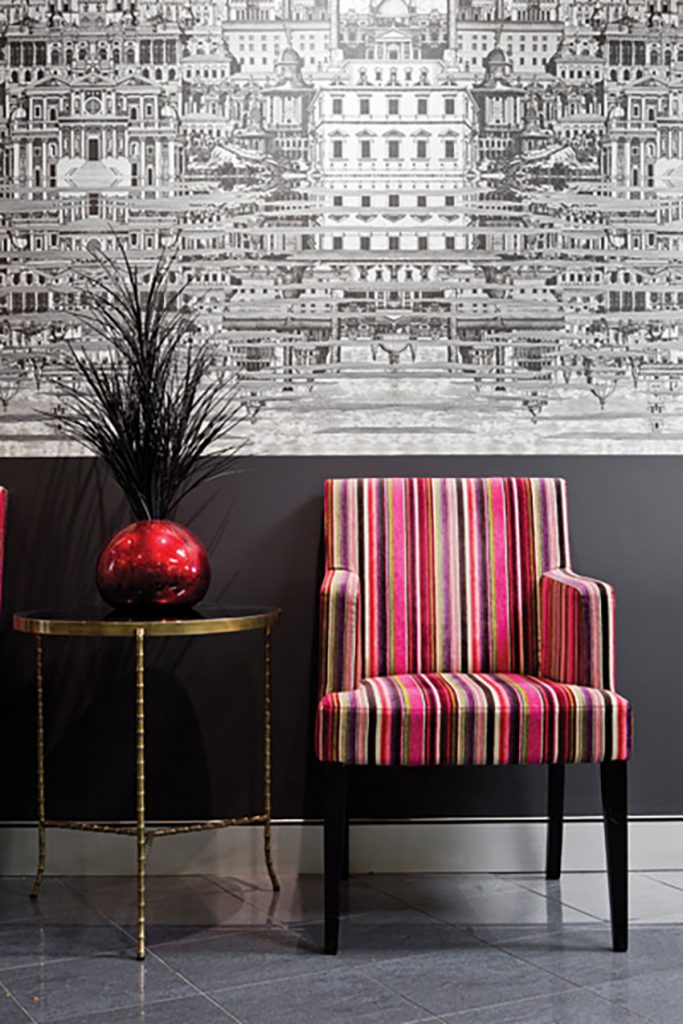
Opt for furniture in vivid or pale colours as well as accessories that will soften the effect of the black and make the décor scheme more pleasing to the eye. All rooms need a focal point that catches the eye and adds visual interest with a pattern or colour that really stands out. Wall coverings and fabrics available for every style and budget are ideal for adding that wow factor to a room.

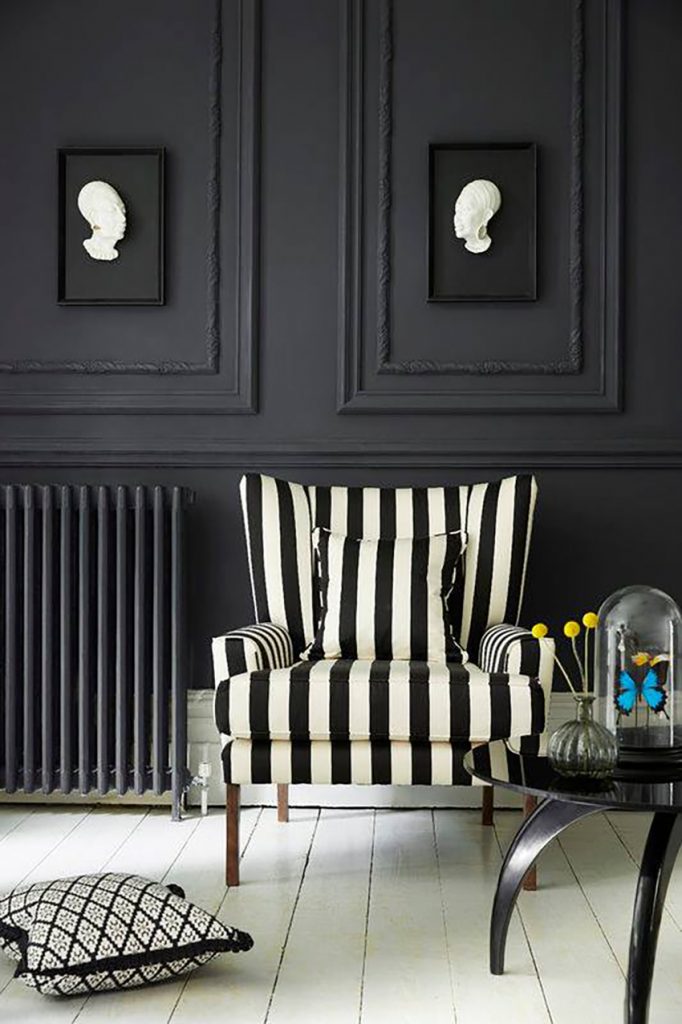
Here, the Fornasetti wallpaper, the metallic accessories and the colourful striped fabric of the accent chair work together to create style and charm. There is absolutely nothing moody or dark in this small hallway.

Consider black tone on tone patterns

Using subtle tone on tone patterns is a sure-fire way of adding visual interest to any room. A fabric or wall covering that produces a beautiful motif through its reflection of the light is a wonderful way to add style without adding a lot of colour. We can also see how much impact a single colour can have against a black background. Everything seems to pop and shine next to black! This wallpaper and fabric is available with Versa Style Design
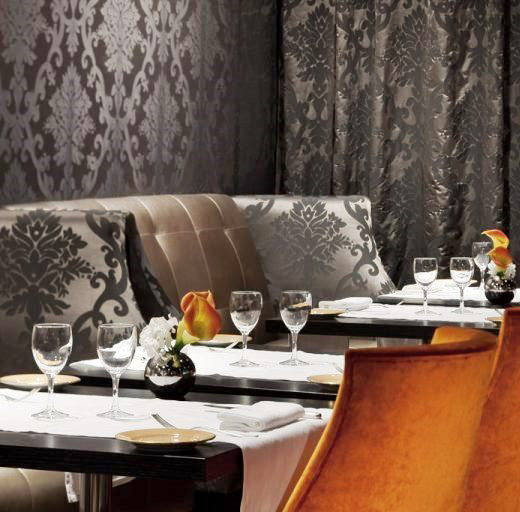
 Consider black tone on tone patterns

Try painting a part of the wall

Try painting a part of the wall

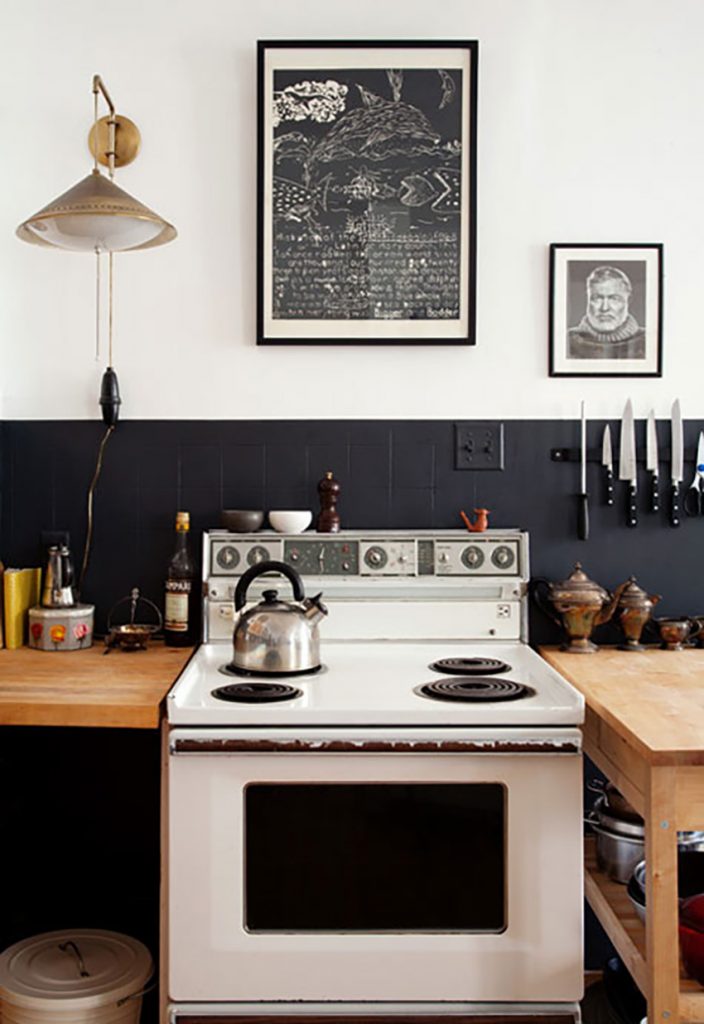
This is a great design trick…paint only a part of the wall, leaving the other part white. In this kitchen, painting the entirety of the four walls black would have been overwhelming, but painting the bottom half turned out to be just the perfect dose.

In this bright room, matte black paint is what is needed because glossy paint would create a distracting and annoying mirror effect taking away from the beauty of the black. With today’s technology, you can have a matte finish that is also highly durable and washable for rooms such as kitchens and bathrooms.

As we can see here it is possible to create a delicate room with black. In this case with Benjamin Moore paint, a huge rectangle as well as the corner chest of drawers was painted. In addition to creating a focal point at the head of the bed, black serves as an all important anchor to this otherwise very pale room. Small butterfly decals contrast nicely from black to white and add a feminine touch. This is a very economical DIY project!
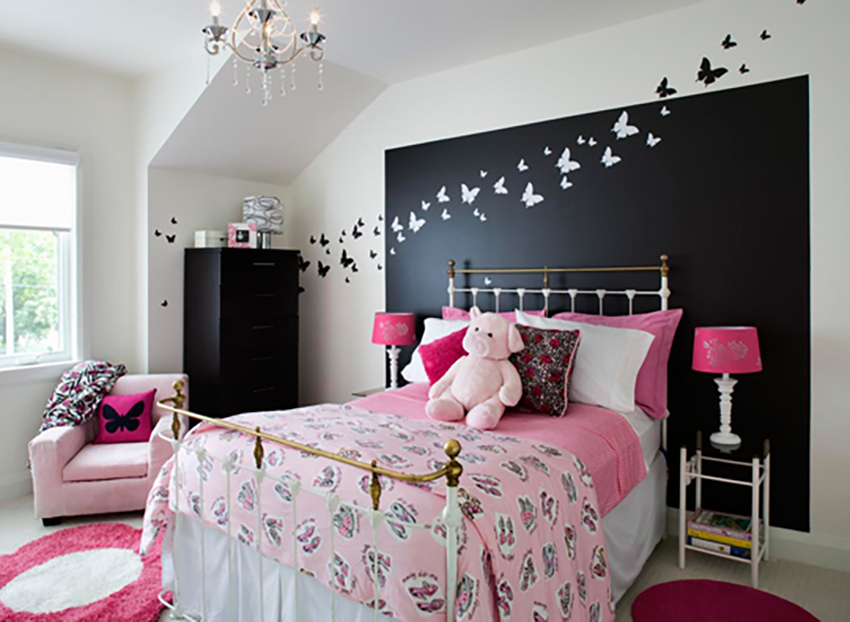
Try painting a part of the wall

The basic truth about black is that there are as many nuances of black as there are whites and creams. You can also experiment with different surface finishes such as matte, lacquer, metallic, mosaic and satin… the sky is the limit when it comes to designing with black.

You would like to adopt some of these ideas in your own space but you don’t know where to start?

Contact us to transform your home or office according to your style, your budget and your specific needs. By discussing your project we can provide you with relevant information concerning our services, the process and our design fee.

Click here to contact us.
Choose the Perfect Colours

Written by Lucie Pitt · Categorized: Decorating with color · Tagged: black ceiling, black room, black walls, decorating with black, interior design black, painting black, painting in black, renovating with black

May 31 2019

Organizing Your Home in 5 Steps

I confess that I am addicted to the process and rewards of organizing. While certain individuals are crazy about exercise or chocolate, I obsess over finding ways of restructuring items and spaces with style, functionality and flair! When I’m in a new environment, I constantly imagine new ways of optimizing the space and design so it’s more coherent, efficient and beautiful.

Organizing Your Home in 5 Steps

But if you’re not an organization addict, here are five winning strategies that I always share with my clients. They should motivate you into getting organized ONCE AND FOR ALL!

Step 1: Recruit help!

If you want to share the load, you must delegate certain tasks. Family members that contribute an effort in the de-cluttering of the space will be much more apt and motivated to maintain the new structure in the long run.

Recruit help!

If you are single, go ahead and propose an exchange with buddies who also have the same objective. One week-end the team is at one person’s home and the next week-end at another’s, and so on and so forth. With this type of team rotation there is a momentum and more discipline to stick to the plan.

Step 2: Establish a schedule with a final date.

Establish a schedule with a final date.

You will realize that you have way more possessions than you remembered!

Be realistic! Don’t underestimate the amount of prep time required for setting up your storage systems as well as the evacuation of items that will be recycled, sold, thrown out and given away. You will discover lost or forgotten items; you will be revising documents, and will be pulling out items that were stowed away deep within your pantry, cupboards and lockers.

Step 3. Prepare the evacuation

Define in advance where you will temporarily store everything you intend on giving away or selling. Prepare this zone with the adequate boxes, garbage bags and recycle bins. You also need to schedule the transportation of all items going to loved-ones, friends or charitable organizations.

Prepare the evacuation

Step 4: Clarify the purpose of each room!

Clarify the purpose of each room!

Once you have established clearly which activities take place in this zone, withdraw every item that isn’t related or associated. By grouping objects together by category and by assembling them in the area they will be used in, we effectively eliminate a number of useless procedures. This process also helps in identifying what has become superfluous in our lives.

Some questions to consider: Have I used this item in the last year? Will this object contribute to a definite future project of mine? Do I need to consider letting go of certain unfinished projects?

According to the Pareto Principle, we use only 20% of our belongings 80% of the time, so it is highly probable that you will be left with items that should outright leave the premises.

Step 5: Cultivate the habit of handling an object only once.

Rather than transferring items from one pile to another and procrastinating in their inevitable treatment, develop the habit of immediately managing your documents and all other objects that accumulated into clutter.For example, upon arriving, open your mail and address each document; bills get placed in the ‘bills to pay’ file, envelopes and garbage go into the recycle bin, and other papers are immediately archived in an appropriate file for easy access and future retrieval.

 Cultivate the habit of handling an object only once

Truly processing your mail every time you bring it in can take 5 minutes, but at least you banish clutter, disorderly piles and the endless searching of important documents. Managing your finances and paying your bills on time become much simpler when everything is in its place and on hand…bonus!

To conclude

 Cultivate the habit of handling an object only once

Admittedly, we have trouble getting the job done because it simply isn’t enjoyable. One of the goals of this article was to offer you a small source of inspiration and a few strategies that have made a difference with my clients as well as in my own clutter.

Having said that, more and more individuals are consulting professional organizers either for the development of personalized storage solutions, or to receive help in the actual execution of certain tasks. According to them, the benefit of working with a pro far out ways the costs, and provides enough motivation and expertise to make a noticeable difference. Getting organized once and for all contributes to your quality of life, so don’t wait any longer!

You would like to adopt some of these ideas in your own space but you don’t know where to start?

Contact us to transform your home or office according to your style, your budget and your specific needs. By discussing your project we can provide you with relevant information concerning our services, the process and our design fee.

Click here to contact us.

Get Organized

Written by Lucie Pitt · Categorized: Organizing and de-cluttering · Tagged: interior design, interior organization and decoration, organization, organizing your home

May 12 2019

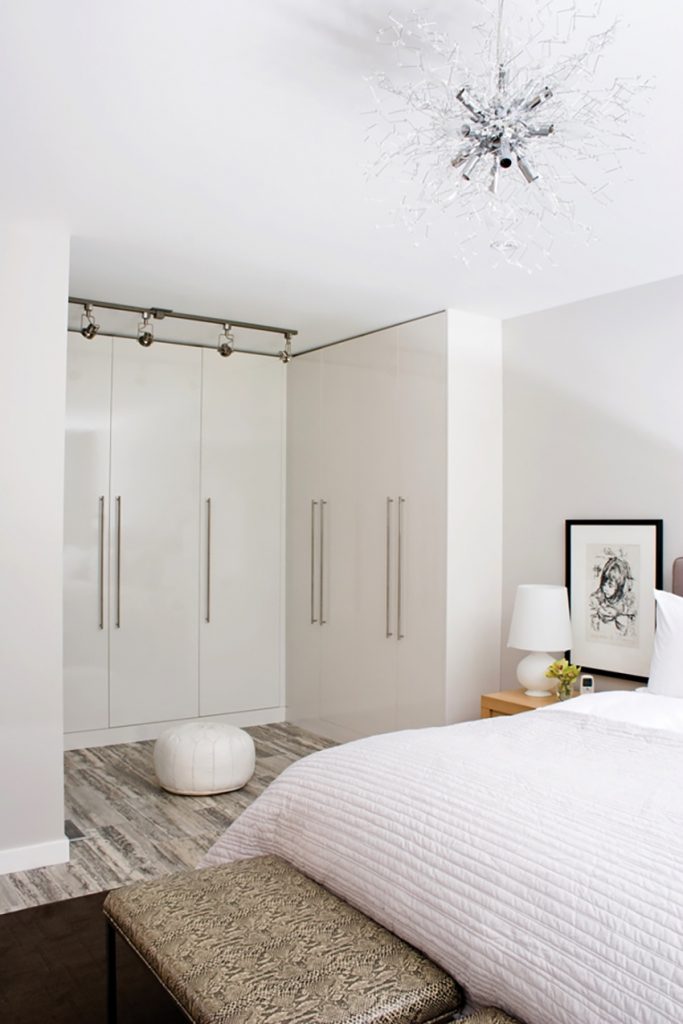
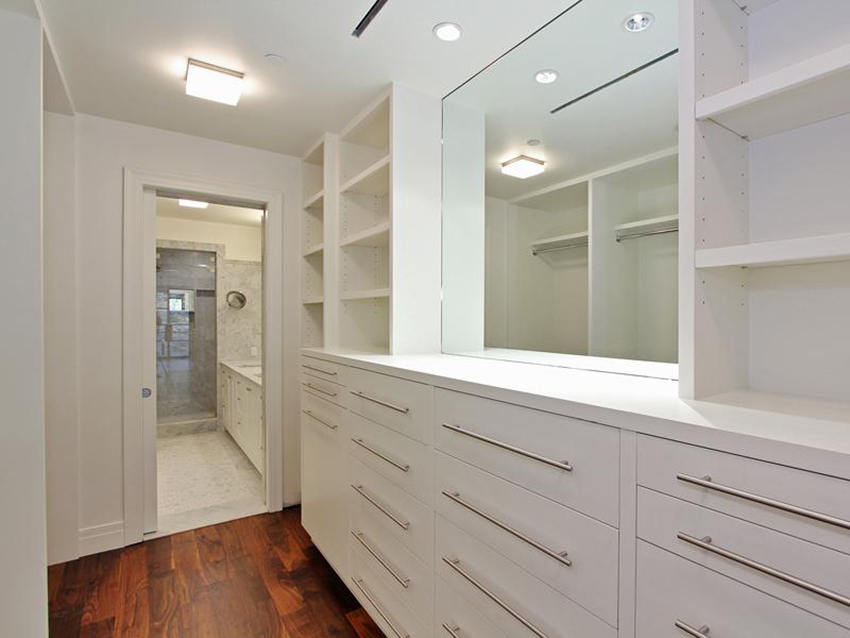
How to design a functional closet or walk-in

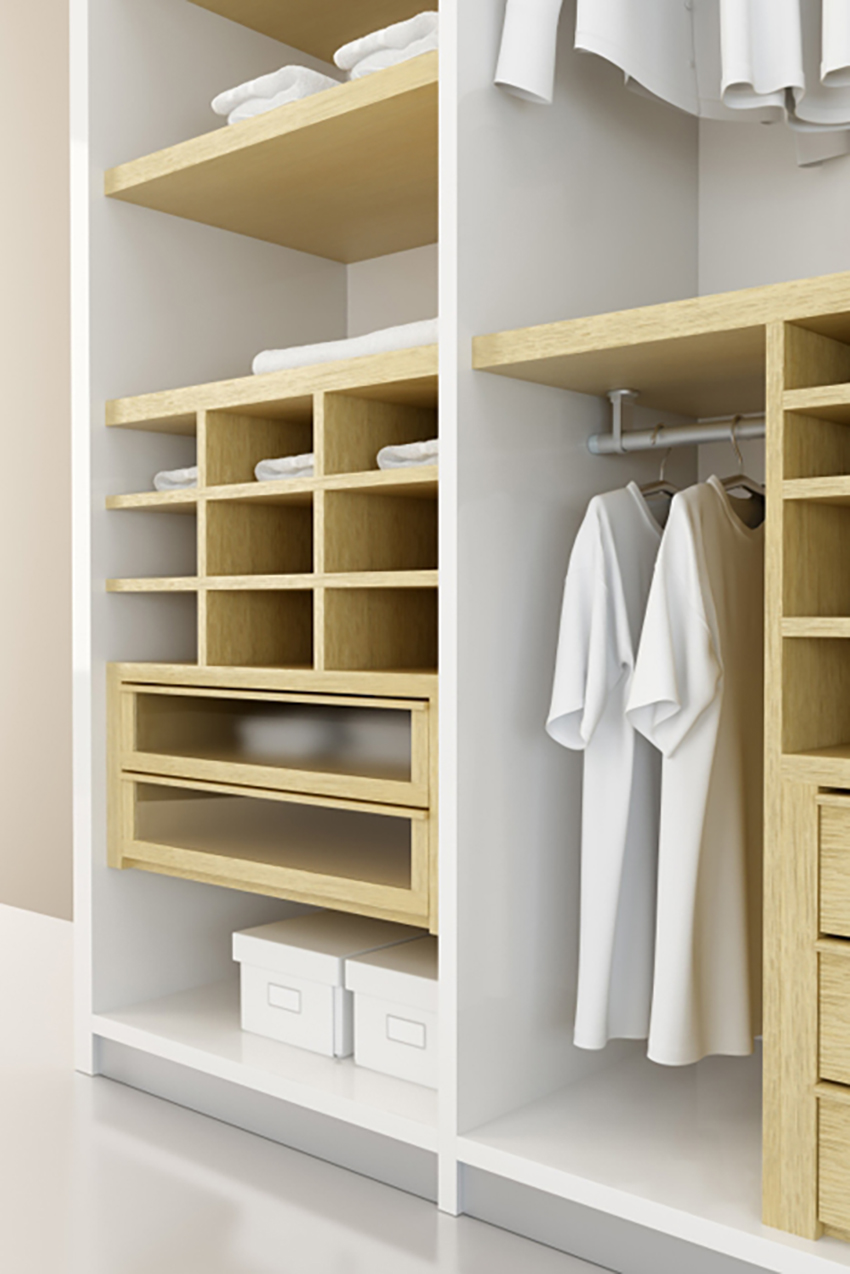
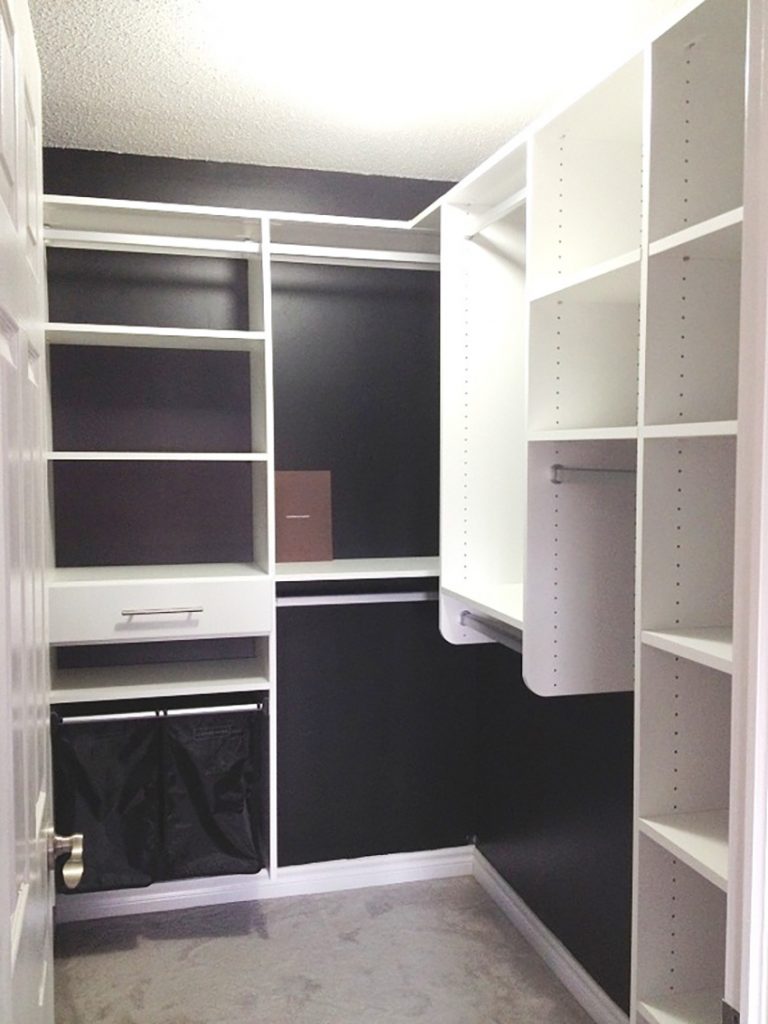
A well-designed closet or walk-in is crucial to eliminating clutter and maintaining organization in the bedroom. Good planning and observation skills will help you maximize every square inch of available space.

Modular storage, adjustable storage, shelves, drawers, rods, hanging storage, hooks: there is a whole range of storage solutions to optimize closet use. Here are a few ideas to help you make the choices that will best meet your needs.

Measure the available space

Measure and make a note of the size of each closet in the house: width, height, depth and the space taken up by shelves and doors. These measurements will help you decide how you can best make use of each closet.

Calculate the space needed

To determine the space you need, sort items into categories. Then, next to each item make a note of its approximate size; this will give you a fair idea of the space required. Remember to allow for 5 cm between pieces of clothing; lack of space and ventilation can lead to stuffy smells and unwanted creases.

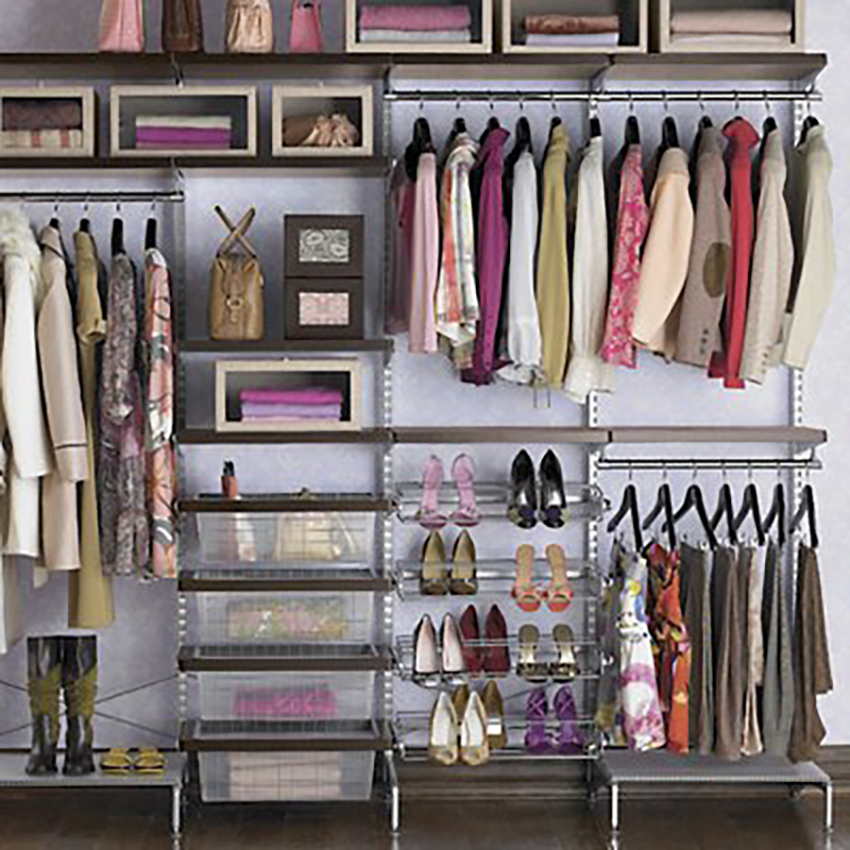
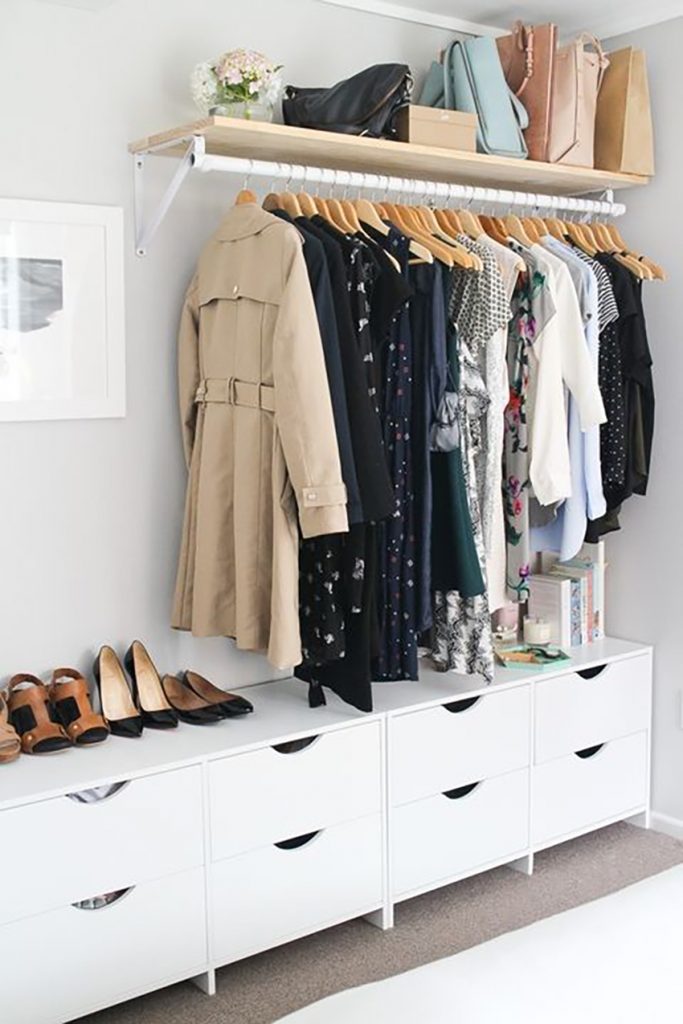
The best space saving trick I use is: Double up your closet rods, one above the other, to double your hanging storage space for short clothes such as shirts and blouses;

If you don’t like how your storage space is organized, you probably won’t use it properly (i.e. put things away). There are different ways to store an item (hanger, basket, shelf), and your choices should reflect your personal preferences. Of course, take into account the item’s size, closet doors, etc.

Modular Systems

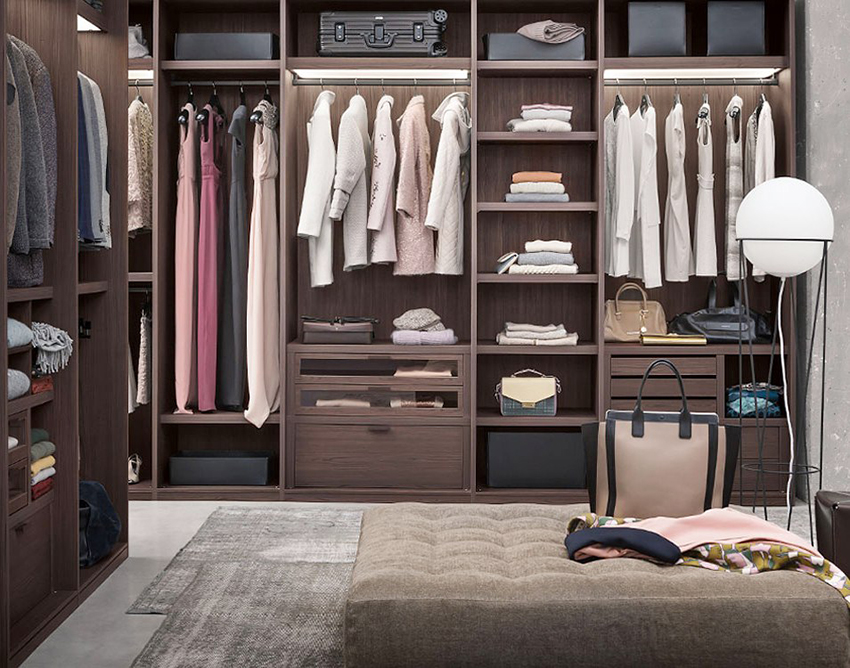
Durable, high-quality storage solutions such as modular systems are recommended if your needs, storage habits and style of clothes to be stored are fairly stable. You can have this custom designed and built. Prefabricated systems are also available in simple and easy-to-build solutions. You can maximize your available space and adapt the closet to accommodate the items you want to put there.

With this type of storage, you usually start with base units, the standard and corner units, which you can superimpose. To these base units and closet rods you can add drawers of varying sizes, stationary or sliding shelves, cubic organizers, doors and different racks for shoes, pants, jewellery and belts, etc.

Adjustable Shelves

Adjustable shelves provide maximum versatility. Because their configuration and design makes them easy to adapt to a given space, adjustable shelving systems represent a versatile solution that is ideal for rooms where needs are likely to evolve over time. Adjustable shelves are good value, easy to put up, very adaptable and require very few tools and building knowledge to install.

To conclude…

The modern closet has come of age. With the range of styles and storage solutions available, closets have become prominent features of a well-designed home. Take note: no more excuses for neglecting your closets!

You would like to adopt some of these ideas in your own space but you don’t know where to start?

Contact us to transform your home or office according to your style, your budget and your specific needs. By discussing your project we can provide you with relevant information concerning our services, the process and our design fee.

Click here to contact us.

Get Organized

Written by Lucie Pitt · Categorized: Walk-ins, Closets, Shelves

Feb 13 2019

Shelves and storage ideas for the home and office

Most of our rooms require clever strategies to organize clothing, books, files, important documents, kitchen items and electronic components. The problem arises when every surface becomes cluttered and we begin to feel overwhelmed!

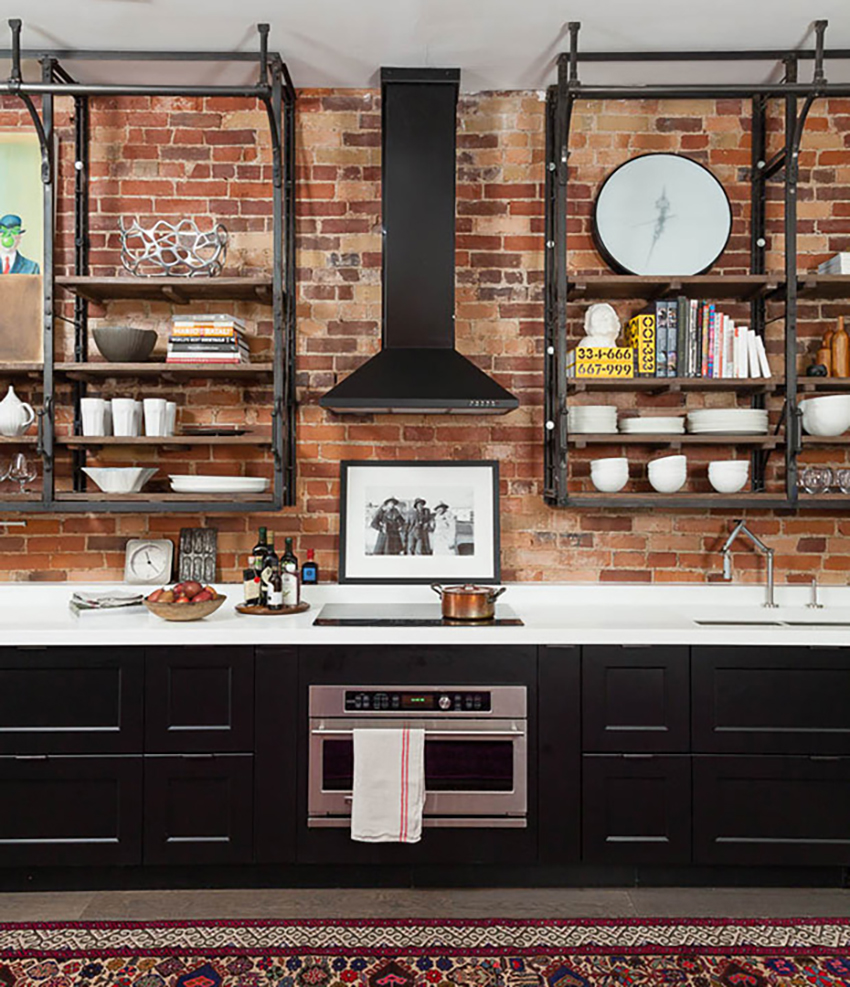
We will have a look at some great shelving available in a variety of styles and for every budget. We will also have a quick glance at the major shelf categories so you can identify which type of shelf will best meet your needs. You will then be inspired with shelf ideas for every room in the house as well as the office. Shelves can be purchased off the shelf, ordered online or custom made, like these ones. These rustic industrial shelves were custom designed and built out of recycled barn wood and welded steel. They were then ceiling mounted.

Shelves and storage ideas for the home and office

Industrial shelving available
at Versa Style Design

Shelves are split up into 6 major categories

  1. Free standing shelves (without a back panel)
  2. Open shelves (with no door)
  3. Closed shelves (hide-away storage)
  4. Wall-mounted cubes and modules
  5. Sliding recessed shelves
  6. Custom built-in shelves

Free standing shelves

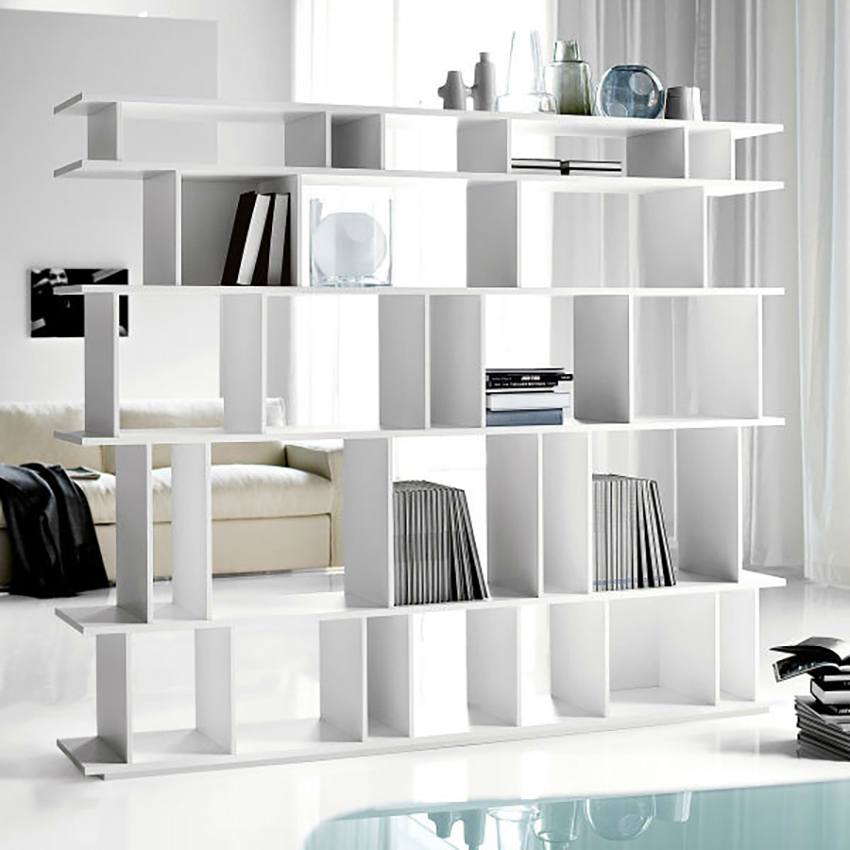
Free standing shelves

Without any back panels, open free standing shelves can also play the role of room divider.Light passing through the shelves into the other zone gives a much lighter feel than a solid division. The trick here is to avoid stacking and filling every shelf, maintaining a look that remains light, airy, paired back and roomy!  

Open shelves

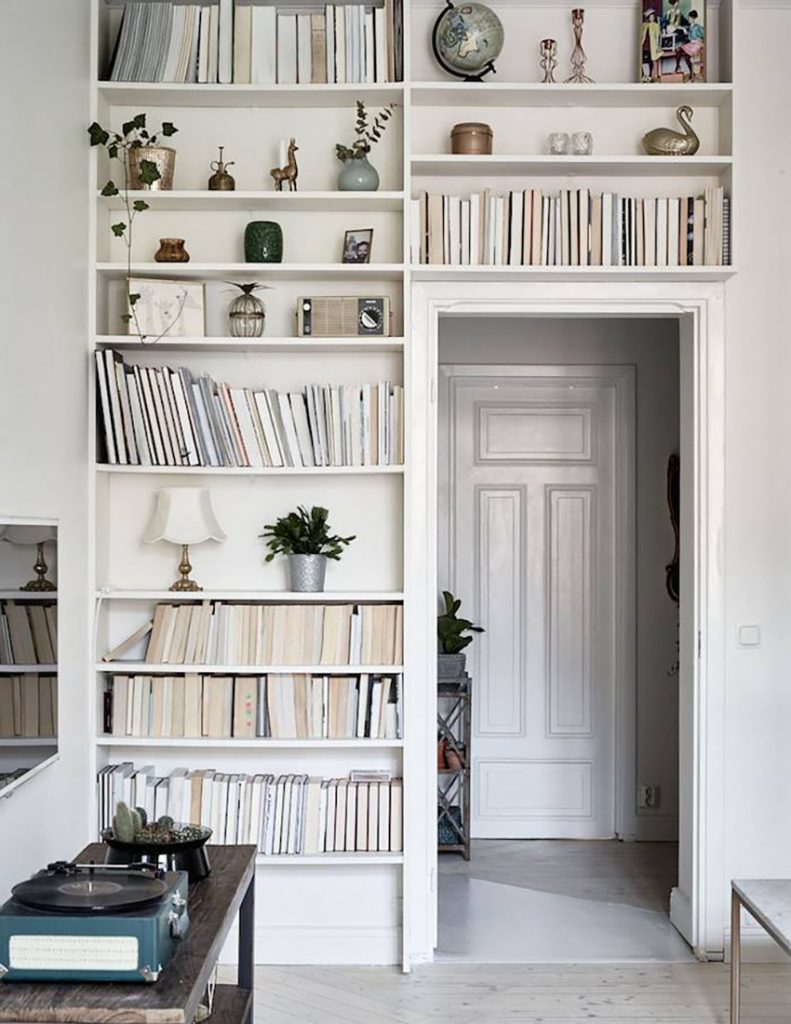
Open shelves can look great, but they can also be a problem. They must not be cluttered and disorganized. Here is a great looking custom built book-case that is fully open. Clients are always surprised when I suggest optimizing the wall space around a door. I believe it enhances the room architecturally and it adds valuable storage. Keep a little bit of empty space on the shelves to allow the items to breathe and remain un-cluttered.

Open shelves

Closed shelves

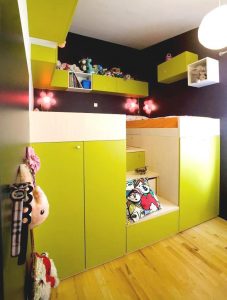
Closed shelves

Closed shelves are perfect for quick and easy clean ups in kids’ rooms and play areas. Control clutter and keep them organized with all this hide-away storage. Make sure they can reach the shelves so they can learn to keep their play zone, school books and clothes organized as they grow older. Custom shelving is a great way of optimizing small and compact spaces. Notice the steps are also pull-out drawers.

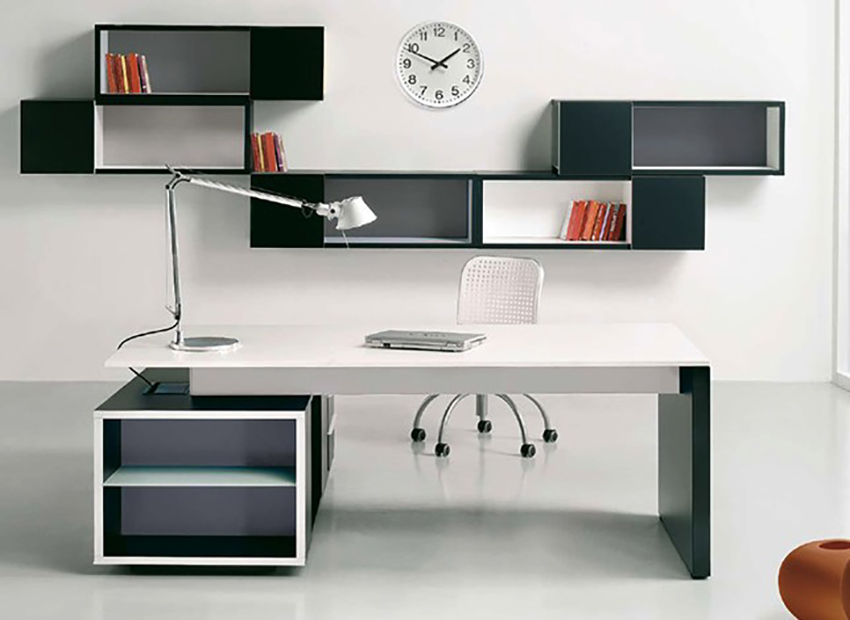
Wall mounted cubes and shelves

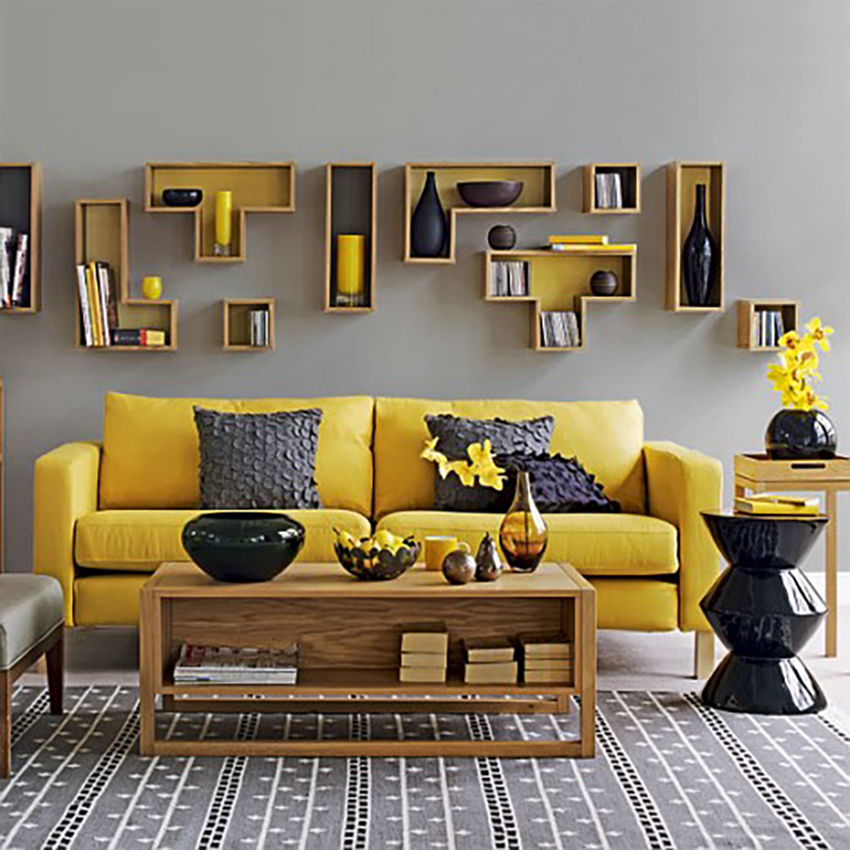
Create a zone exactly as you like in the shape and configuration you require. Modular systems like these ones were designed to adapt to your needs and are available custom-built or off the shelf in a variety of finishes and colours. Even within a small zone, you can quickly and simply create your own shelving. Wall modules help you save precious space and can combine open and closed storage, depending on your needs.

Wall mounted cubes and shelves

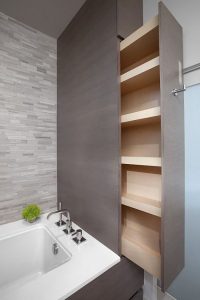
Sliding recessed shelves

Sliding recessed shelves

Recessed shelves are very high in demand for kitchens and bathrooms for clutter control. Hide away your cosmetics and cleaning products even if you have a compact bathroom. This custom recessed shelving was added at the end of the bath. You can also have recessed shelving made in the kitchen for your food, pots, spices and small cooking appliances.

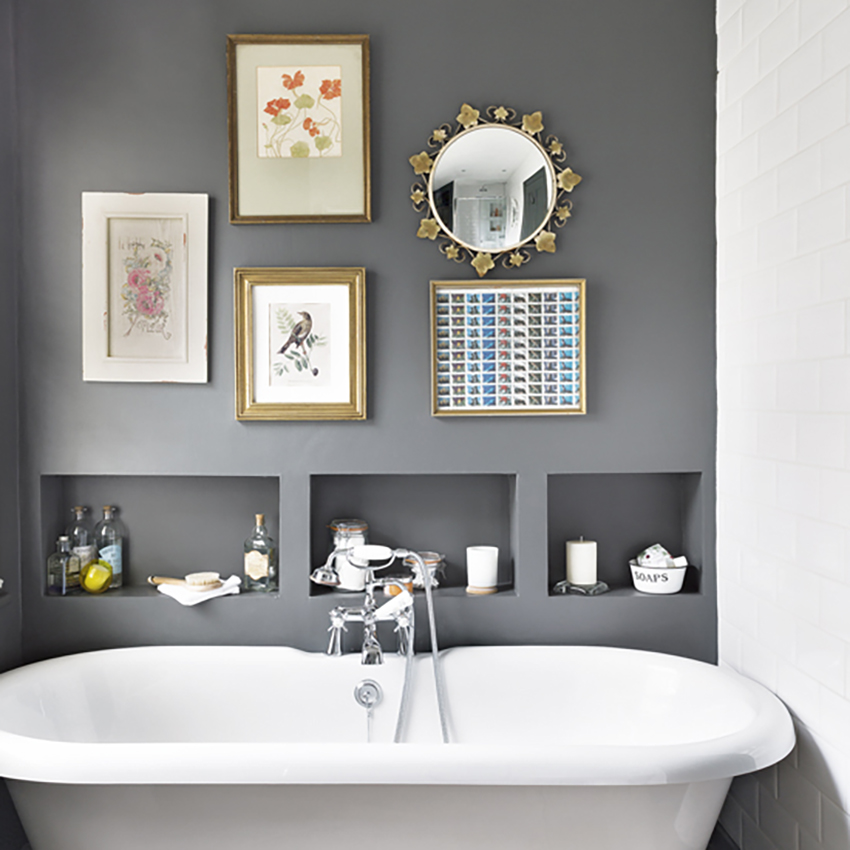
Custom built-in shelves

These shelves are ‘built into’ the wall in between the vertical wall studs. You can also have built-in shelves surrounding your fireplace, near your bed for books and a lamp, as well as in the hallway for added storage.
Built-ins add instant style and elegance to a space. These are open niches for easy access, but many built-ins have nice doors with added moulding and chic handles.

Custom built-in shelves

Here are some more ideas to inspire you; shelves that work hard and look great in a variety of materials and finishes.

Office storage modules and shelves

Office storage modules and shelves

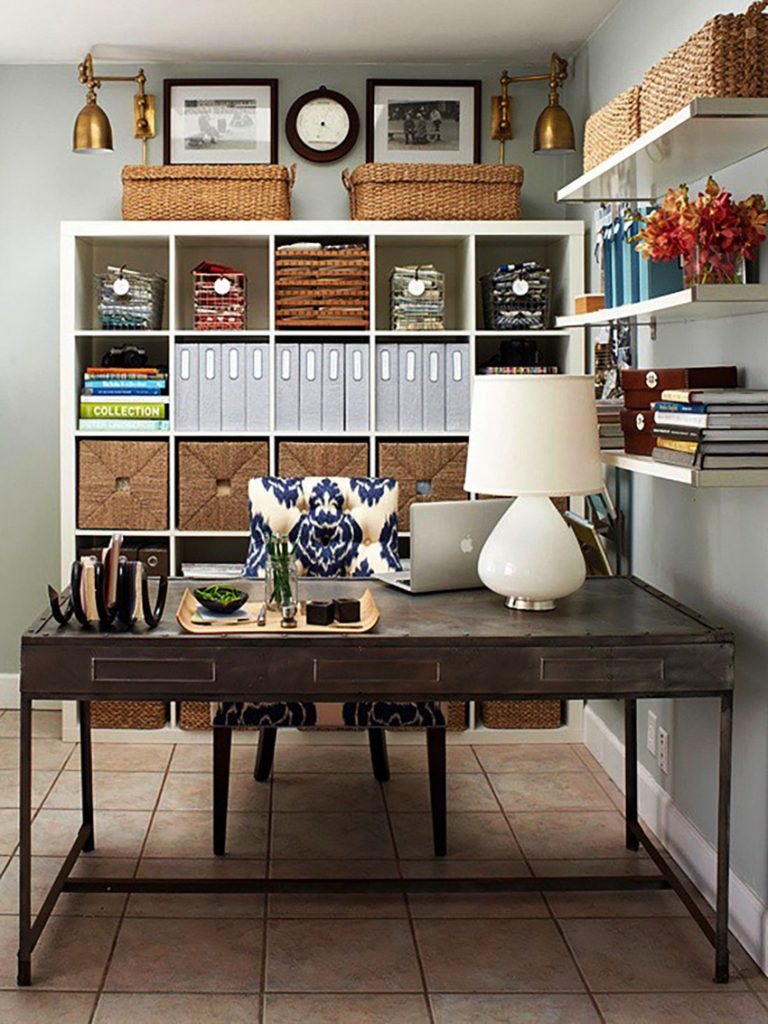
When assisting clients with their office installations I often recommend wall mounted storage modules. It seems we are often lacking in floor space so getting things off the floor increases traffic flow and productivity. Evaluate what can be stored behind closed doors or drawers and what should be exposed on open shelving allowing for frequent and easy access.

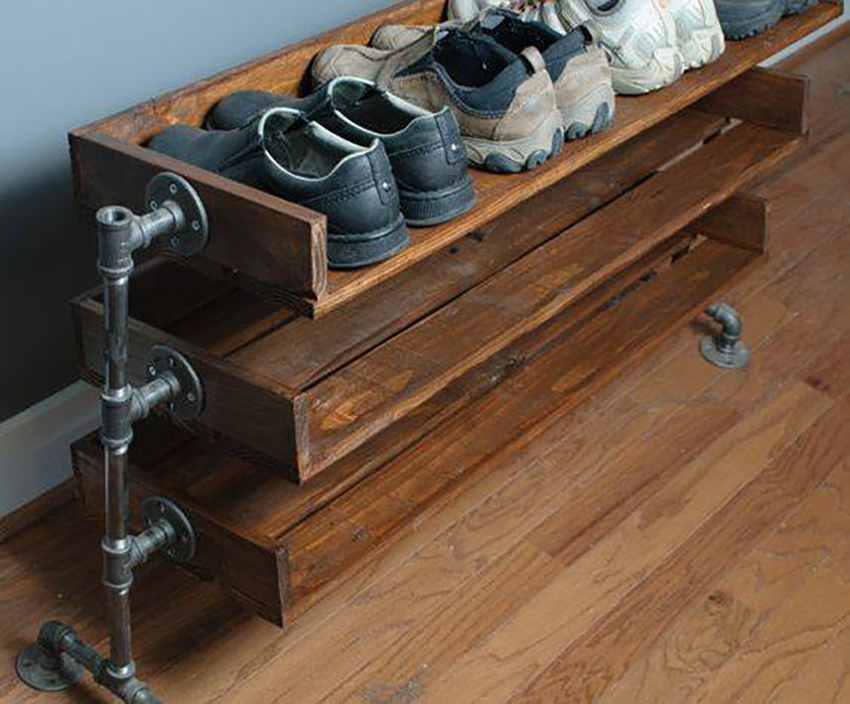
Industrial style recycled wood shelves

Shelves for keeping the front entrance organized are priceless. These custom built recycled wood industrial style shelves (available at Versa Style design) were the perfect choice for a casual corner. Recycled and barn wood shelves can be ordered and built for every room in the home or office. They can also be wall-mounted with industrial pipes like these.

Industrial style recycled wood shelves

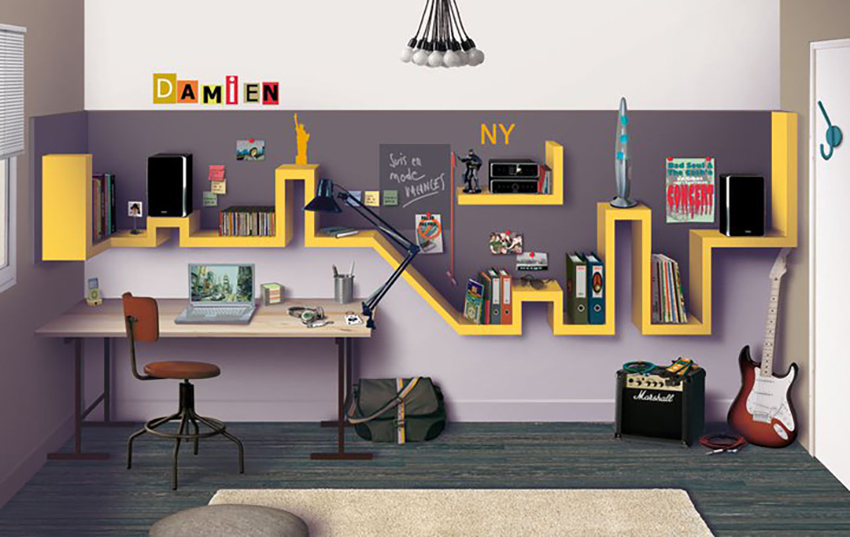
Open shelves for a teen’s room

Open shelves for a teen’s room

We clearly see in this 3D rendering how shelving can be totally unique and personalized without being excessively complicated to build. Add a bit of strategically placed paint and you’ve got a great zone sure to impress every young spirited person around! Functionality and coolness combined!

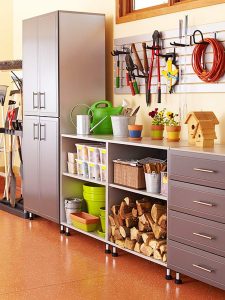
The garage and workshop

In these zones, typically the priority is function over beauty. In this work and hobby zone we see a great combination of opened and closed shelving, all highly accessible. The units are purchased and placed strategically to fill specific functions. Notice how the open shelving in the centre doubles as a handy work surface, and how by placing a higher unit on each side you create a natural working alcove and a wall for hanging tools.

To conclude

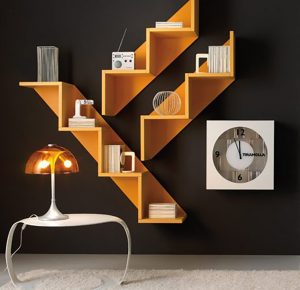
I am leaving you with a purely inspirational photo to demonstrate how when we present a great idea to a half-decent handy-man we can create shelving that is truly unique, functional and great looking without being necessarily expensive.

You would like to adopt some of these ideas in your own space but you don’t know where to start?

Contact us to transform your home or office according to your style, your budget and your specific needs. By discussing your project we can provide you with relevant information concerning our services, the process and our design fee.

Click here to contact us.

Get more ideas on shelves, storage ideas and tips for staying organized here:

Get Organized

Written by Lucie Pitt · Categorized: Walk-ins, Closets, Shelves · Tagged: bookcase, built-in shelving, interior design, shelving, shelving design, storage design

  • « Previous Page
  • 1
  • …
  • 4
  • 5
  • 6
  • 7
  • 8
  • Next Page »

A home visit is not possible?
Our online interior design services give you access to valuable tips, ideas and professional expertise.
Click here to find out more

Lucie Pitt Interior Designer

Versa Style Design
Lucie Pitt

info@versastyledesign.ca
social-icon social-icon social-icon social-icon

Receive precious advice and exclusive promotions by subscribing to Lucie's Design & Organization Newsletter

Interior Design & Renovations

Kitchen Design
Bathroom Design
Living Room Design
Basement Design
Get Organized
Closets and Walk-Ins
Home Theater
Custom Furniture
Curtains and Blinds
Bedroom Design
Home Office Design
Man Cave and Garage
Kid Zones
Small Spaces
Perfect Colour
Exceptional Walls
Exterior Design

Design Blog

Kitchen
Renovations
Walk-Ins and Shelves
Small Spaces
Kids
Organize & Declutter
Seasonal Decorating
Bathrooms
Mudrooms and Vestibules
Trends and Styles
Decorating With Colour
Window Treatment
Laundry Room
Office
Outdoors
Bedroom
Cabinets
Basements

Versa Style Design © 2026 · Contact Us · Privacy Policy · Managed by webwilly.ca